




decoration tips decoradhouse from decoratoradvice, start writing letsbuildup.org blog, which diagram shows lines that must be parallel lines cut by a transversal?, best tech news feedcryptobuzz, dreamwithjeff com, start wizzydigital.org blog, about blog wizzydigital.org, why interior design is interesting mintpaldecor, how was teckaya construction equipment founded

How to Remove Paint From Brick – Guide to Safe and Effective Methods

I’ve worked on restoring old brick walls for years, and one of the toughest challenges I’ve encountered is removing layers of stubborn paint without damaging the natural surface. If you’ve inherited a painted fireplace, exterior wall, or vintage brick feature, you know exactly what I mean. The good news? With the right method, patience, and a few safety measures, you can restore your brick’s original charm.

In this guide, I’ll break down how to remove paint from brick using three tried-and-true methods—chemical stripper, TSP solution, and acid treatment. I’ll also share when to use each, what safety precautions matter most, and how to finish your project so your brick looks clean and vibrant again.

Why Removing Paint from Brick Needs Care

Brick is porous, which means paint tends to sink deep into its surface. Using the wrong tools or techniques can lead to etching, crumbling, or discoloration. That’s why gentle, methodical removal is key—your goal is to lift the paint without harming the brick beneath.

Some DIYers jump straight to sandblasting or grinding, but those methods can permanently scar the surface. Instead, the three methods below are both effective and restoration-safe, provided you follow proper safety steps.

Quick Comparison of Paint Removal Methods
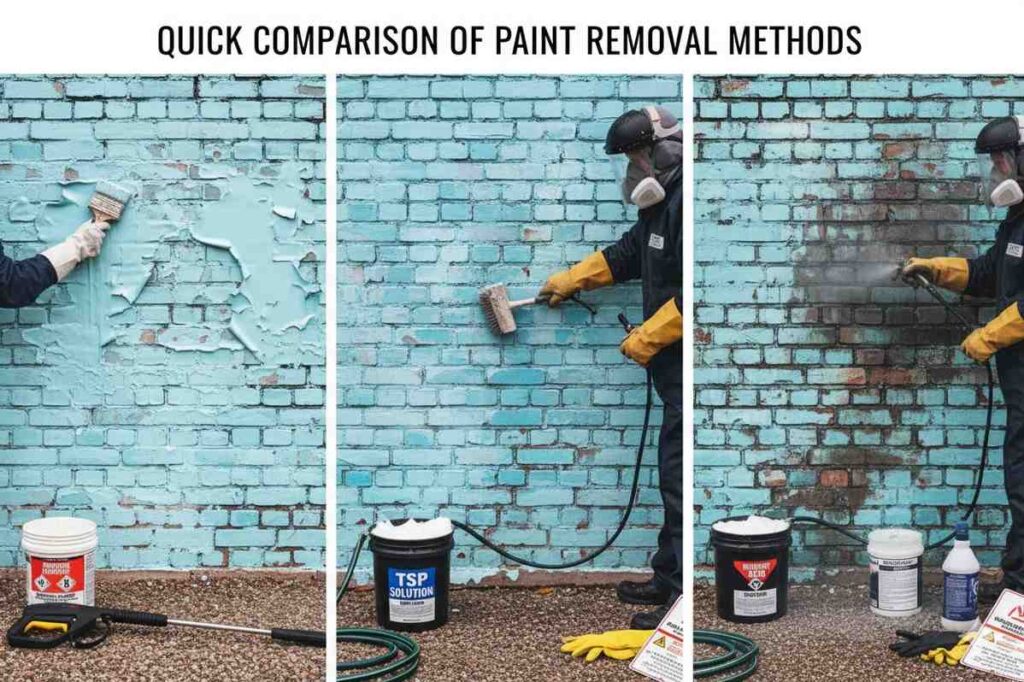
Quick Comparison of Paint Removal Methods

Method Best For Difficulty Safety Level Tools Needed
Chemical Stripper + Pressure Washer Thick or multiple paint layers Moderate Medium Paint stripper, brush, pressure washer
TSP Solution + Scrubbing Light paint layers or small areas Easy Low TSP, brush, bucket, hose
Acid Solution (Muriatic or Brick Acid) Deep or old paint stains High High (requires full PPE) Acid, sprayer, neutralizer, pressure washer


Method 1: Using a Chemical Stripper and Pressure Washer

Step 1: Prepare and Protect

Start by covering plants, windows, and surfaces you don’t want to be affected by the chemical. Always wear gloves, goggles, and a respirator mask. Chemical strippers can irritate skin and eyes, so full protection is essential.

Step 2: Apply the Stripper

Choose a paint remover designed specifically for masonry—these are formulated to penetrate porous surfaces like brick. Apply it generously using a paintbrush or roller, coating the area evenly.

Step 3: Let It Work

Follow the product instructions for dwell time. Most strippers need at least 15–30 minutes, but some may take longer depending on paint thickness. You’ll see the paint start to bubble or peel.

Step 4: Wash Away the Residue

Once the paint loosens, use a pressure washer to remove it. Keep the pressure between 800–1,200 PSI to avoid damaging the brick. If some paint remains, repeat the process on those areas.

Method 2: Using a TSP Solution
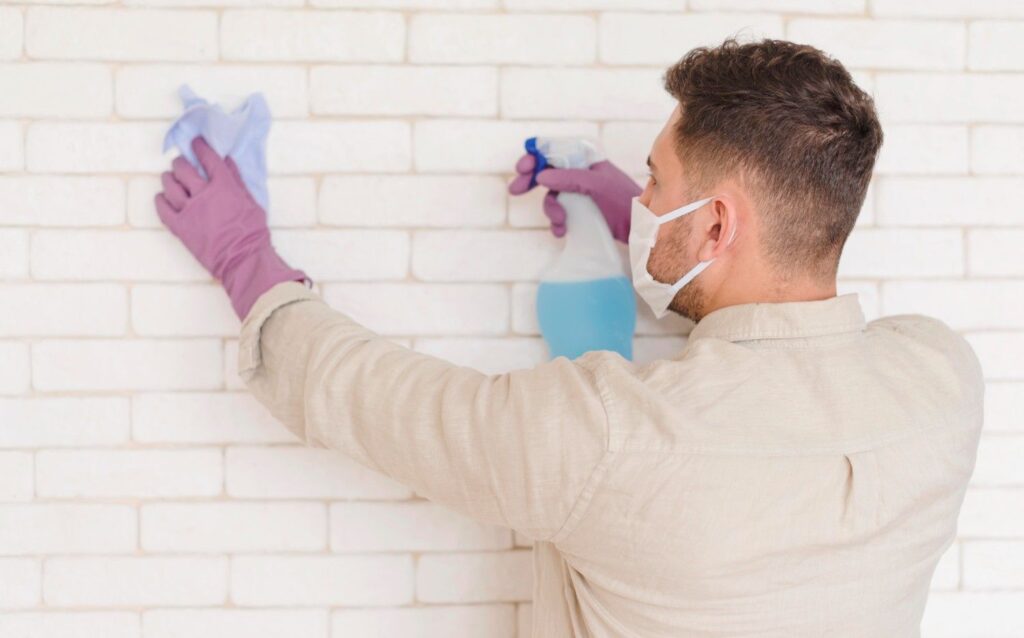
Method 2 Using a TSP Solution

If you want a less harsh approach, trisodium phosphate (TSP) is your friend. It’s a powerful cleaning agent that helps lift paint, grease, and grime.

Step 1: Mix the Solution

Combine ½ cup of TSP with 1 gallon of warm water in a bucket. Always mix it in a well-ventilated area and wear gloves, as TSP can irritate the skin.

Step 2: Apply and Scrub

Dip a stiff-bristle brush into the solution and scrub the painted area firmly. Allow it to sit for about 10 minutes, giving it time to penetrate the paint layer.

Step 3: Rinse and Repeat

Rinse the area with a garden hose or low-pressure washer. If needed, reapply the TSP solution and repeat scrubbing until the paint begins to lift.

This method is best for smaller areas, or when the paint is already peeling. It’s safe for indoor use and great for brick fireplaces or accent walls.

Method 3: Using an Acid Solution (Use With Extreme Caution)

When all else fails, acid-based solutions like muriatic acid or commercial brick cleaners can dissolve even the most stubborn paint. However, this approach requires maximum safety and should be your last resort.

Step 1: Safety First

Wear a face shield, acid-resistant gloves, and long-sleeved protective clothing. Ensure the area is well-ventilated or work outdoors. Cover nearby surfaces to prevent acid damage.

Step 2: Apply the Acid

Dilute the acid according to manufacturer directions. Use a spray bottle, brush, or old broom head to apply it evenly on the painted brick. You’ll notice bubbling or fizzing—that’s the acid reacting with the paint.

Step 3: Pressure Wash and Neutralize

After a few minutes, rinse thoroughly using a pressure washer to remove the residue. Then, neutralize the acid by applying a baking soda and water solution, scrubbing gently, and rinsing again.

Important Tip: Never mix acid with bleach or other cleaners—it produces toxic fumes.

Pro Tips for Best Results
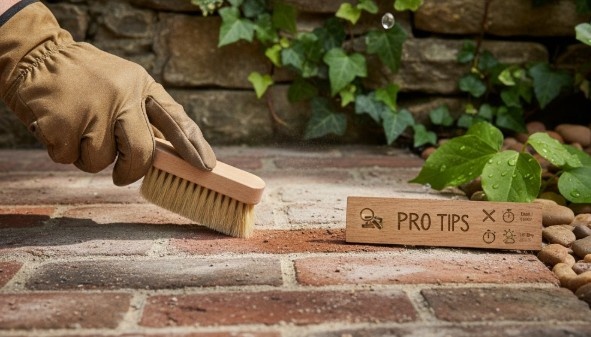
Pro Tips for Best Results

  • Test a small area first. Always start on an inconspicuous spot to see how the brick reacts.
  • Avoid metal brushes. Use nylon or natural bristle brushes instead to prevent scratching.
  • Don’t rush. Multiple light applications are safer than one aggressive attempt.
  • Let the brick dry fully. After washing, allow at least 24–48 hours before repainting or sealing.

Common Mistakes to Avoid

  1. Skipping PPE – Chemical exposure can cause burns or respiratory irritation.
  2. Using too much pressure – High PSI can damage mortar joints or erode soft brick.
  3. Ignoring neutralization – After acid use, always neutralize; otherwise, residues can continue damaging the brick.
  4. Not protecting surroundings – Runoff can discolor or kill nearby plants.

How to Restore the Brick After Paint Removal
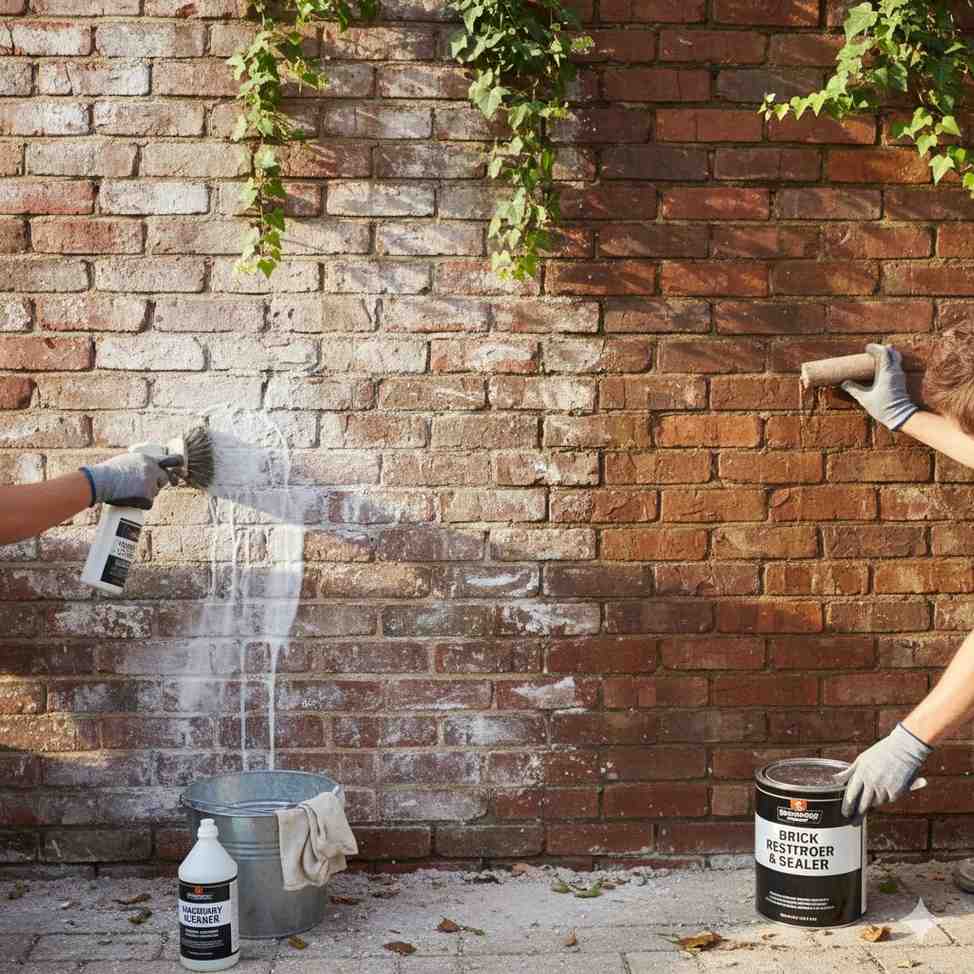
How to Restore the Brick After Paint Removal

After cleaning, you might notice some discoloration or haze. Don’t worry—this can be fixed easily.

  • Use a brick cleaner or mild detergent to remove leftover residue.
  • For uneven color, consider applying a brick restorer to revive its natural tone.
  • Seal the surface with a breathable masonry sealer to protect it from moisture and staining.

Also Read: how to buy a house without a realtor

FAQs About Removing Paint from Brick

1. Can I use a heat gun to remove paint from brick?

You can, but it’s not ideal. Heat guns work better on wood or metal. On brick, they can cause cracking or release fumes from old paint layers, especially lead-based paint.

2. How do I know if the paint contains lead?

If your home was built before 1978, it’s possible the paint contains lead. Use a lead test kit before beginning. If lead is detected, contact a certified professional for safe removal.

3. Can I sandblast paint off brick?

It’s strongly discouraged. Sandblasting can strip away the top layer of brick, leaving it rough and permanently damaged. Always choose chemical or cleaning solutions instead.

4. What’s the safest way for indoor paint removal?

For indoor brick, the TSP solution is safest. Avoid acid or strong strippers inside due to fumes and potential surface damage. Make sure to ventilate the room well.

A Clean Slate Worth the Effort

Restoring brick to its original form takes patience and attention to detail, but the reward is timeless beauty. Once you know how to remove paint from brick the right way—balancing power and precision—you’ll see why professional restorers swear by these tested techniques. Whether you’re uncovering historic charm or refreshing a tired wall, careful paint removal can breathe new life into any brick surface.


More From Author

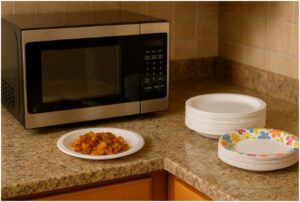
can you microwave paper plates

Can You Microwave Paper Plates? What I Learned the Hard Way

How to Use Keurig Coffee Maker

How to Use Keurig Coffee Maker

What Is Not a Physical Security Measure for Your Home? (And What Actually Works)

If you’ve ever wondered what is not a physical security measure for your home, you’re already thinking smarter than most people. Physical security is about the tangible, touchable stuff—locks, doors, fences, alarms, lighting, and cameras. Everything else—like policies, background checks for service providers, or watching your kids’ online friends—can boost safety, but those aren’t physical controls. Getting this distinction right helps you prioritize budget and effort where they matter most. 

What counts as a “physical” control—and what doesn’t?

Physical security is the category of measures you can see and touch: sturdy doors and frames, deadbolts, window locks, perimeter fencing, lighting, alarm sensors, and cameras. Their job is to prevent or detect intrusions in the real world, not just online. Authoritative guides describe physical security as protecting the site and equipment with things like strong construction, intrusion detection, adequate lighting, and controlled access. 

By contrast, non-physical measures include policies and behaviors—vetting contractors, setting house rules, joining a neighborhood chat, or monitoring kids’ social media. Those are administrative or procedural controls, not physical ones. In security frameworks, controls are grouped as administrative, technical, and physical; only the last category involves concrete barriers or devices.

Physical security is the category of measures you can see and touch

So… what is not a physical security measure for your home?

Short answer: anything that isn’t a tangible barrier, device, or built-environment change. Examples:

  • Vetting a cleaning company’s license/insurance → administrative due diligence, not a physical control.

  • Setting house policies (e.g., do not post vacation plans online) → administrative/behavioral, not physical.

  • Monitoring family members’ online acquaintances → a safety practice, but not a physical measure. (You may see quiz-style questions listing this as “not physical.”)

  • Being friendly with neighbors or joining a watch group → useful social deterrence, still not a physical device or barrier. 

Which physical measures should every home prioritize?

If you can touch it and it hardens the target, you’re in the right lane. Start with:

  • Strong doors, frames, and deadbolts on exterior entries and the garage service door.

  • Window locks and reinforced glass/film in vulnerable spots.

  • Perimeter lighting (motion-activated where practical) and trimmed landscaping for natural surveillance.

  • Alarm system with door/window sensors; cameras covering entries and approaches.

Police and crime-prevention checklists reinforce these basics: good lighting, visible house numbers, maintained fencing and gates, and trimmed trees to deny roof/window access.

Which physical measures should every home prioritize

How does CPTED help you avoid non-physical “placebos”?

Crime Prevention Through Environmental Design (CPTED) is a great filter: if a measure changes the environment (access control, sightlines, lighting, territorial cues), it’s in physical territory. If it’s just a rule or a reminder, it’s not. Think natural surveillance (clear views to doors and driveways), access control (gates, locks), and maintenance (well-kept spaces signal ownership and deter scouting).

Are smart-home and Wi-Fi settings “physical”?

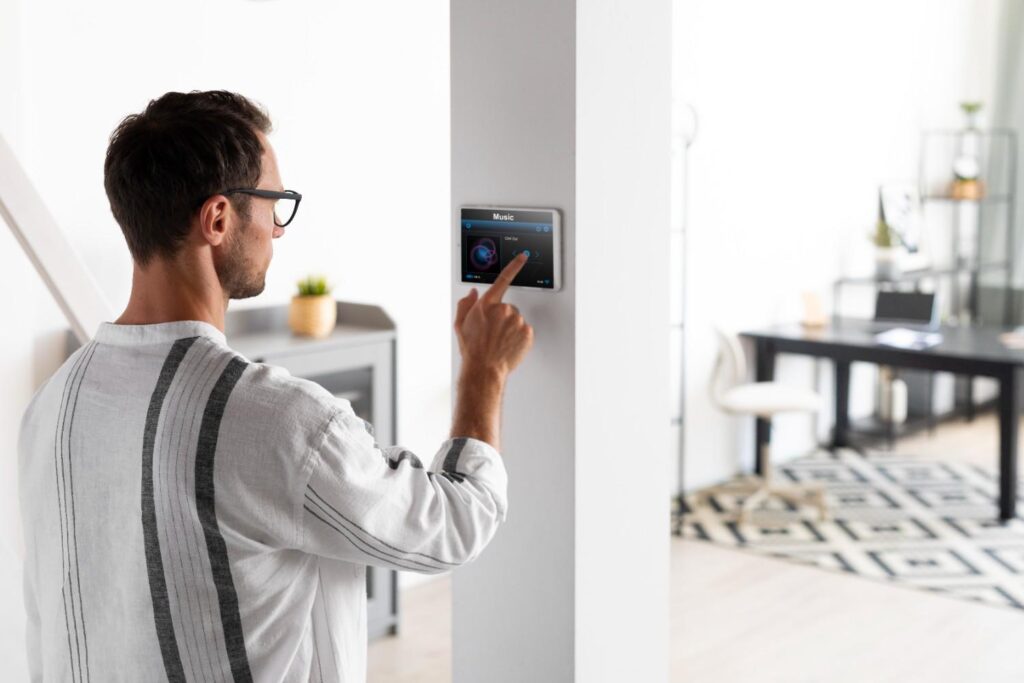
It depends. Smart locks, cameras, alarms, and lighting hardware are physical measures—because you can touch and deploy them to control or detect access. But passwords, firewalls, and Wi-Fi rules are technical controls. Valuable? Yes. Physical? No. (Secure your network anyway—many break-ins are part physical, part digital.) 

Are smart-home and Wi-Fi settings “physical”

Practical mistakes to avoid (that weaken physical security)

  • Hiding keys outdoors. It creates a predictable weakness; use a lockbox or controlled key management instead.

  • Overgrown shrubs near entries. They provide concealment and defeat natural surveillance—trim to knee/waist height.

  • Dark entryways or side yards. Poor lighting erases deterrence; add motion-sensing lights. 

Frequently Asked Questions

1. Is “getting to know my neighbors” a physical security measure?

No. It’s a valuable administrative/behavioral practice that can improve awareness and reporting, but it isn’t a device or barrier. Pair it with tangible upgrades like lighting, locks, and cameras for best results. 

2. Are smart locks and security cameras considered physical security?

Yes. They’re hardware that controls or monitors access in the real world. Their software settings (passwords, app permissions) are technical controls, but the devices themselves deliver physical protection and deterrence. 

3. Is “don’t post vacation plans on social media” a physical measure?

No. That’s a policy to reduce information leakage and crime opportunity. Keep following that rule—and reinforce it with visible, well-lit entries and an alarm system.

4. What physical upgrades give the biggest ROI first?

Start with door hardware (solid cores, reinforced strikes, quality deadbolts), window locks/film on ground-level glass, motion lighting, and an alarm with perimeter sensors. These map to police and CPTED guidance for access control and surveillance. 

The Bottom Line (Make It Real, Not Just Theoretical)

To truly secure your place, treat non-physical steps (policies, vetting, online hygiene) as the supporting cast—useful but not substitutes. The star of the show is hard, tangible protection guided by CPTED and validated by law-enforcement checklists: doors, locks, lighting, alarms, cameras, and a tidy, well-lit perimeter. 

And in case you’re still wondering what is not a physical security measure for your home, remember: if you can’t install it, wire it, mount it, or lock it, it’s probably not physical—so don’t let it replace the real hardware. 

More From Author

is electrical tape waterproof

Is Electrical Tape Waterproof? My Wet-Weather Wiring Lesson

What Role Does Competition Play in International Trade

What Role Does Competition Play in International Trade?

Is Electrical Tape Waterproof? My Wet-Weather Wiring Lesson

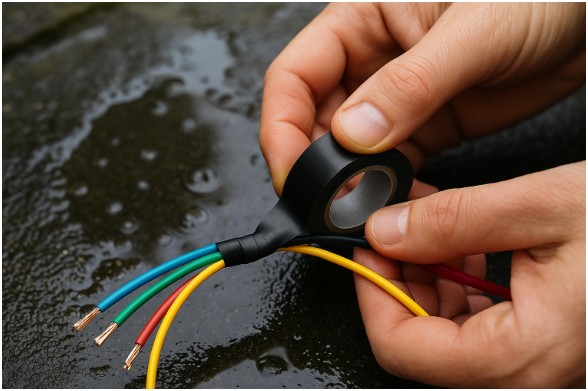
I’ll admit it—I once thought electrical tape could fix anything. When a garden light wire started sparking after a summer storm, I grabbed my trusty roll of black tape, wrapped it tight, and proudly called it “problem solved.”

The next morning, the light flickered, fizzled, and died. That’s when I learned the hard truth about is electrical tape waterproof—it isn’t.

Electrical tape is handy, yes, but it’s not a magical waterproof shield. It can handle a splash or two, but long-term exposure to water? That’s where it fails miserably. Let me explain why, what you can safely use it for, and what to grab instead when moisture is part of the picture.

What Does It Mean When We Ask, “Is Electrical Tape Waterproof?”

What Does It Mean When We Ask, “Is Electrical Tape Waterproof?”

When people ask is electrical tape waterproof, they usually mean, “Can it survive rain, splashes, or a little water exposure?”

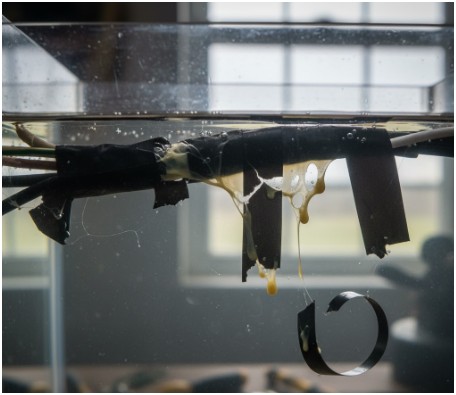
Standard electrical tape is water-resistant, not waterproof. It can endure light moisture for short periods, but the adhesive eventually breaks down under constant wetness.

Most electrical tapes use rubber-based adhesives that lose grip when exposed to water. The longer they stay wet, the weaker they get. That’s why outdoor repairs or underwater fixes wrapped in standard tape usually fail—sometimes dramatically.

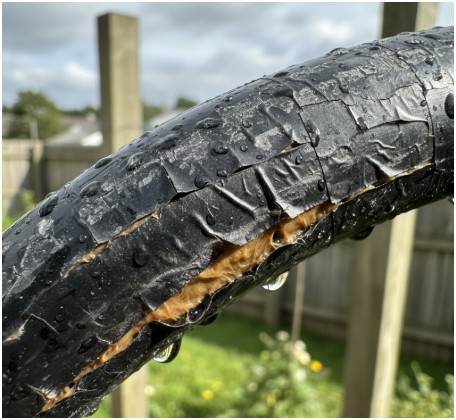
If you’ve ever noticed your taped wire peeling or cracking after a few days outside, that’s exactly what’s happening: the adhesive is degrading, seams are opening, and moisture is sneaking in.

Why Does Electrical Tape Fail in Wet Conditions?

Why Does Electrical Tape Fail in Wet Conditions?

I learned that the problem isn’t just water—it’s the combination of pressure, temperature, and time. Even the best electrical tape struggles against those three forces.

Adhesive failure happens because rubber-based glue softens when exposed to humidity. Once it loses tack, it can’t hold the wrap tight anymore.

Add seam gaps, and you’ve got tiny channels where water can travel. Even if you layer it thick, water pressure can push through those overlaps, especially on curved or uneven surfaces.

And then there’s the outdoor factor—sunlight, UV rays, and temperature swings. These make the tape brittle and cracked.

That’s why that glossy black finish turns grayish and flaky after a few weeks outside. Electrical tape just isn’t built for outdoor waterproofing—it’s meant for insulation and temporary fixes.

So, What Should You Use Instead of Electrical Tape for Wet Areas?

If you need to protect wires in wet or submerged locations, it’s time to reach for the big-league materials. I’ve tried several, and these are the ones that actually do what electrical tape can’t.

Waterproof Option Best For Key Benefit
Self-Fusing Silicone Tape Outdoor splices, garden lights Creates a seamless, adhesive-free rubber barrier
Heat-Shrink Tubing (with adhesive) Wire joints, connectors Shrinks tightly and seals moisture completely
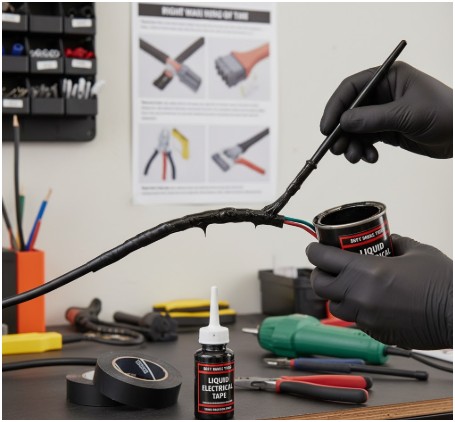
Liquid Electrical Tape Irregular or hard-to-reach areas Forms a flexible, brush-on waterproof coating
Waterproof Connectors Underground or outdoor wiring Pre-sealed, gel-filled, and safe to code
High-Grade Rubber Tape (e.g., 3M) Heavy-duty or high-voltage uses Extremely moisture- and weather-resistant

These products might cost a bit more upfront, but they’re designed for lasting protection. For example, self-fusing silicone tape doesn’t even use glue—it bonds to itself, creating a waterproof rubber sleeve that won’t unravel in the rain.

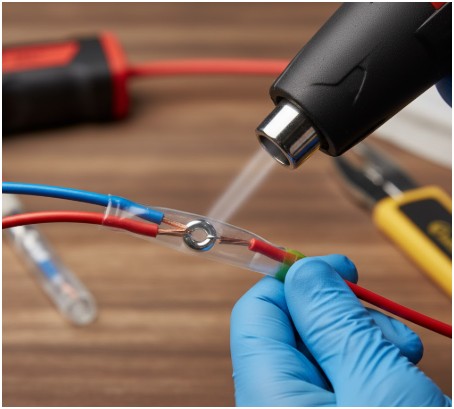
If you’re dealing with outdoor lighting or marine wiring, heat-shrink tubing is a lifesaver. When heated, it hugs the connection tight and seals out water completely, especially the adhesive-lined kind. For weird shapes or quick touch-ups, liquid electrical tape is my go-to—it’s like painting on waterproof armor.

Can You Use Electrical Tape Outdoors at All?

Can You Use Electrical Tape Outdoors at All?

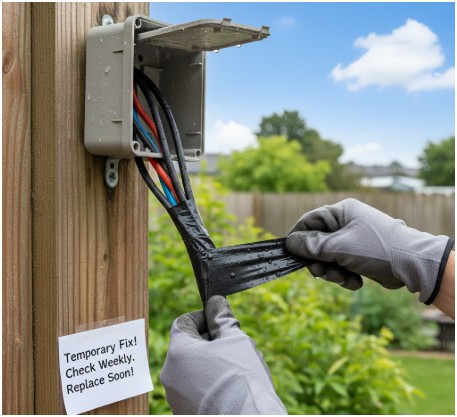
Yes—but only with caution. You can use electrical tape outdoors for temporary fixes, like wrapping exposed wire ends or securing a loose cable. Just remember, it’s not a long-term solution.

If you’re using it outside, keep these tips in mind:

  • Wrap tightly with overlapping layers to minimize water entry.

  • Cover the taped area with a protective casing if possible.

  • Check it regularly, especially after heavy rain or temperature shifts.

Think of it like a Band-Aid, not a permanent patch. It’ll help for a bit, but you’ll need a proper repair soon.

How Can You Make Electrical Tape More Water-Resistant?

How Can You Make Electrical Tape More Water-Resistant?

If you’re in a pinch, there are ways to boost your tape’s performance. First, make sure the surface is clean and dry before wrapping—dust and grease weaken adhesion.

Wrap in overlapping spirals, stretching slightly to create tension. Then, for added protection, layer silicone or mastic tape over it.

You can also apply a thin coat of liquid electrical tape on top for extra sealing. I once used that trick when fixing my boat’s deck light, and it held through the whole season. It’s not a UL-rated fix, but for short-term outdoor work, it’s a decent hack.

Still, for any permanent connection exposed to water, a proper waterproof connector or heat-shrink tubing is always safer and compliant with electrical standards.

What Do Safety Organizations Say About It?

According to Underwriters Laboratories (UL) and similar safety bodies, standard electrical tape should never be your only waterproofing method. It’s not rated for wet or submerged environments.

If you’re doing electrical work near water, you’re required to use waterproof-rated materials to avoid shock risks and code violations.

When in doubt, check the packaging. Products that are UL-listed for waterproof use will clearly say so. It’s always better to be safe than sorry when electricity and moisture mix.

FAQs About “Is Electrical Tape Waterproof?”

Q1. Can I use electrical tape to fix a leaking pipe?

No—you should never use electrical tape for plumbing. It can’t handle water pressure, and the adhesive will loosen quickly. Use silicone repair tape or plumbing-specific sealing solutions instead.

Q2. What happens if electrical tape gets wet?

If electrical tape gets wet, its adhesive starts to fail. Over time, it loses grip, peels off, and may let moisture reach live wires, creating potential shock or short-circuit hazards.

Q3. What’s the difference between waterproof and water-resistant electrical tape?

Water-resistant tape repels light moisture temporarily, while waterproof tape creates a true barrier against continuous water exposure. Standard electrical tape falls in the first category.

Q4. Can I use electrical tape for outdoor Christmas lights?

Yes, but only as a temporary measure. For a safe, long-term setup, use weatherproof connectors or heat-shrink tubing to seal the connections and keep water out.

The Shocking Truth (Literally): Don’t Rely on Regular Tape for Water Protection

When I first asked myself, “Is electrical tape waterproof?” I wanted a quick, cheap solution. But after a few failed experiments and one near-electrocution scare, I learned that the right materials matter.

Electrical tape is great for insulation, temporary fixes, and indoor projects—but when it comes to moisture, it’s no superhero. If water’s in the picture, switch to self-fusing silicone tape, heat-shrink tubing, or liquid electrical tape.

My rule now? When in doubt, waterproof it properly the first time. Trust me—it’s way better than getting shocked twice.

More From Author

How Much Does a Double Wide Mobile Home Cost

How Much Does a Double Wide Mobile Home Cost?

What Is Not a Physical Security Measure for Your Home

What Is Not a Physical Security Measure for Your Home? (And What Actually Works)

Electrical Wire Connectors Types: My Hands-On Guide to Getting It Right

I still remember the first time I tried to replace a ceiling light in my old apartment. I thought it would be as simple as matching colors—black to black, white to white—but one wrong twist and zap, I learned the hard way that not all connectors are created equal. 

That’s when I started learning about the different electrical wire connectors types, and honestly, it changed the way I handle every wiring project now.

Whether you’re fixing a lamp, wiring an outlet, or setting up a home workshop, knowing your connector types makes all the difference between a secure job and a short circuit waiting to happen.

What are the main electrical wire connectors types?

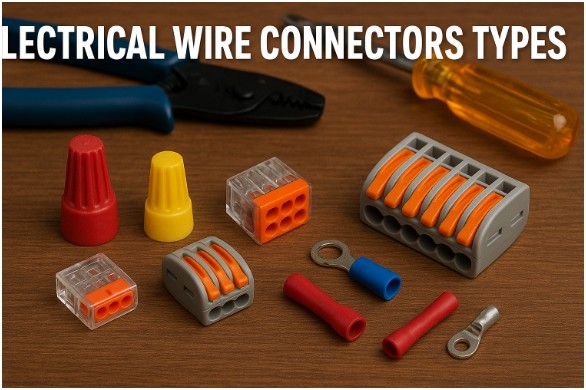
You’ll generally find three primary categories of connectors—twist-on, push-in, and crimp—each with its own perks. Your choice depends on the wire gauge, how permanent the connection should be, and whether you want something reusable.

Twist-on connectors (also called wire nuts) are classics for household wiring. Push-in connectors are newer, faster, and tool-free. And crimp connectors—the tough guys—are your go-to for vibration-heavy environments like vehicles and boats.

Here’s a quick snapshot:

Type Best For Pros Cons
Twist-on Home wiring Simple, affordable Can loosen over time
Push-in Lighting, quick fixes Fast, reusable Not ideal for all stranded wires
Crimp Automotive, marine Permanent, vibration-resistant Requires crimp tool

How do twist-on electrical wire connectors work?

I have a soft spot for twist-ons—probably because they were my first wiring win. You strip the wires, twist them together, then screw on the connector until it grips tight. Inside, there’s a coiled metal insert that secures the wires firmly.

They’re commonly found in junction boxes and general household connections. The DIANZHU 180 PCS Insulating Insert Twist Electrical Wire Connector is a great example—it’s color-coded for different wire sizes, which keeps things simple when you’re juggling multiple wires.

They come in three main styles:

  • Standard twist-on connectors: The everyday option for most residential projects.
  • Winged twist-on connectors: Easier to twist and hold, especially when you’re working overhead.
  • Waterproof twist-on connectors: Filled with sealant for outdoor or damp environments.

While they’re budget-friendly and easy to use, they can loosen due to vibration—so for permanent or high-vibration setups, I usually pick another option.

What should you know about push-in electrical wire connectors?

What should you know about push-in electrical wire connectors?

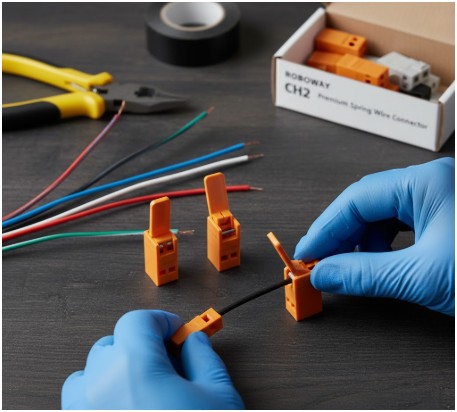
When I discovered push-in connectors, it felt like upgrading from a flip phone to a smartphone. No twisting, no crimping—just strip the wire and push it in. These connectors use an internal spring mechanism that clamps onto the wire securely.

They’re perfect for lighting circuits and quick installations. The ROBOWAY CH2 Premium Spring Wire Connector and Serplex 10Pcs Lever-Nut Wire Connectors are solid choices if you want reliability and flexibility.

I especially love lever-nut connectors (like the WAGO 221-412). You flip the little lever up, insert the wire, and snap it down—done! They’re compatible with solid, stranded, and fine-stranded wires, making them a universal favorite.

The only downside? They’re a bit bulkier than twist-ons, so space can be tight in smaller boxes.

Why are crimp electrical wire connectors popular among pros?

Why are crimp electrical wire connectors popular among pros?

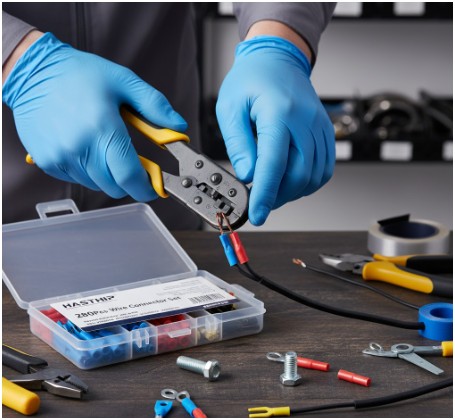
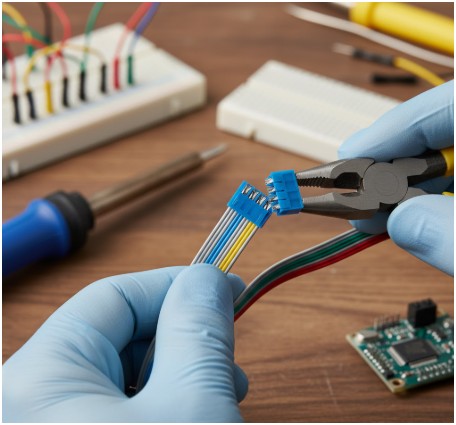
If twist-ons are the beginners and push-ins are the innovators, crimp connectors are the pros. These require a crimping tool that compresses the connector’s metal barrel around the wire, forming a strong, permanent bond.

They’re incredibly secure and vibration-resistant, which is why they’re used in automotive, marine, and aerospace applications. My go-to is the HASTHIP 280Pcs Wire Connector Set, which includes butt connectors, ring terminals, and fork terminals.

Here’s what they offer:

  • Butt connectors: Join two wires end-to-end permanently.
  • Ring and fork terminals: Connect wires to screws or studs—great for control panels.
  • Bullet connectors: Allow easy connection and disconnection without tools.

Some advanced kits even include heat-shrink connectors, which shrink when heated to form a waterproof seal. They’re ideal for outdoor or marine setups.

Are there other electrical wire connectors types worth knowing?

Absolutely—and some of them make your wiring life so much easier.

Terminal Blocks

Terminal Blocks- electrical wire connectors types

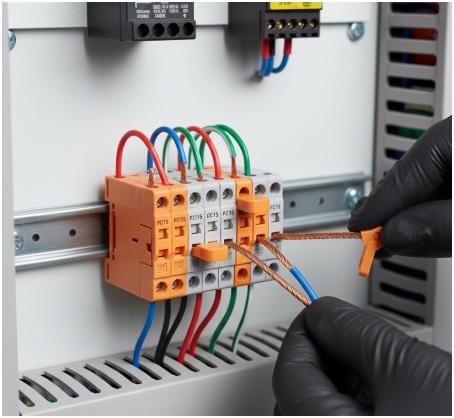
Think of these as wire organizers. They’re used in industrial panels where you need to connect several wires neatly. The PCT-215 Terminal Block Splice is a modern version with levers instead of screws, which I find much easier to use.

Solder Seal Connectors

Solder Seal Connectors- electrical wire connectors types

These are hybrid connectors with heat-shrink tubing and solder inside. When you apply heat, the solder melts, and the tubing shrinks, creating a waterproof, permanent joint—perfect for marine or outdoor work.

Insulation Displacement Connectors (IDCs)

Insulation Displacement Connectors (IDCs)

If you’ve ever hated stripping wire insulation, IDCs are your best friend. They pierce the insulation and make the connection instantly. I’ve used them for small electronic projects where speed mattered more than looks.

How do you choose the right electrical wire connectors types for your project?

Here’s my quick rule of thumb:

  • For home repairs or light fixtures, go with twist-on or lever-nut connectors.
  • For industrial setups or cars, crimp connectors win hands down.
  • For outdoor or marine projects, heat-shrink or waterproof connectors are unbeatable.
  • For control panels, terminal blocks make wiring look like art.

And don’t forget wire gauge compatibility. If the connector doesn’t match your wire size, even the best one won’t hold.

FAQs about electrical wire connectors types

1. Are push-in wire connectors safe for long-term use?

Yes—if you choose high-quality brands like WAGO or Serplex. They’re designed to maintain spring tension over time, keeping the connection secure. However, cheap knockoffs may loosen, so stick with trusted names.

2. Can I reuse twist-on connectors?

You can, but I usually don’t. Over time, the internal coil can lose its grip. If you remove one, it’s safer to replace it with a new connector instead of risking a loose connection.

3. Do crimp connectors need special tools?

Definitely. A proper crimping tool ensures uniform pressure and a strong bond. Using pliers instead might seem convenient, but it weakens the connection and can cause failure.

4. Which connectors are best for outdoor wiring?

Waterproof twist-on or heat-shrink connectors are ideal. They protect against moisture, corrosion, and temperature changes, making them perfect for garden lights or outdoor outlets.

Wrapping It Up with a Spark (and a Smile)

If there’s one thing I’ve learned after years of tinkering with wires, it’s this: a good connection isn’t just about electricity—it’s about reliability. Choosing the right electrical wire connectors types makes your work safer, cleaner, and more professional.

My personal tip? Always keep a small kit of different connector types on hand. You never know when a quick fix will turn into a full project. And trust me, when that happens, having the right connector ready can save your day—and maybe even your light fixture.

More From Author

Personal Property Coverage for a Mobile Home Is What It Actually Covers (and What It Doesn’t)

Personal Property Coverage for a Mobile Home Is: What It Actually Covers (and What It Doesn’t)

How Much Does a Double Wide Mobile Home Cost

How Much Does a Double Wide Mobile Home Cost?

How to Clean Luxury Vinyl Plank Floors Like a Pro (Without Losing Your Mind)

When I first moved into my apartment, I was obsessed with my luxury vinyl plank floors. They looked sleek, modern, and almost too perfect to touch. 

Fast forward a few months—and a few muddy dog paws later—and I realized I had no idea how to clean luxury vinyl plank flooring without ruining that showroom shine. 

I tried everything from vinegar sprays to “miracle” TikTok hacks, and let’s just say… not all of them were kind to my floors.

After a few learning moments (and some near disasters involving bleach), I finally found a cleaning routine that works. 

So, if you’ve ever stared at your LVP floors wondering what’s safe and what’s not, I’ve got you covered.

Why Is It So Important to Know How to Clean Luxury Vinyl Plank Properly?

Why Is It So Important to Know How to Clean Luxury Vinyl Plank Properly?

Luxury vinyl plank (LVP) floors are durable and gorgeous—but they’re also a little high-maintenance when it comes to cleaning. 

I learned that the hard way. Use too much water, and you risk warping. Use the wrong cleaner, and the finish loses its luster.

LVP may look like hardwood, but it’s not built the same. It has a protective wear layer that can break down if you use harsh chemicals or abrasive brushes. So, the trick isn’t to scrub harder—it’s to clean smarter.

I now treat my floors the way I treat my skincare routine: gentle, consistent, and with the right products. Once you get into the habit, it’s surprisingly easy to keep them spotless.

What’s the Best Way to Clean Luxury Vinyl Plank Floors Every Day?

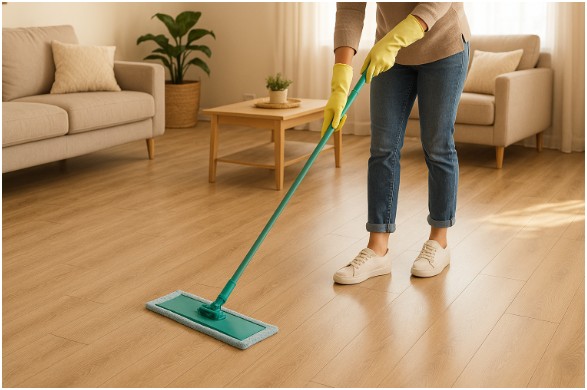
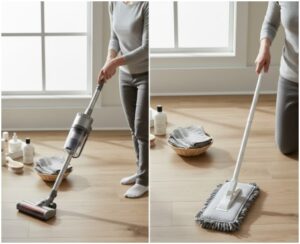
For everyday upkeep, I swear by a quick sweep or vacuum and a light mop once or twice a week. You don’t need fancy tools—just a soft touch and a bit of consistency.

Start with a soft-bristle broom or a vacuum with a hard-floor setting. Skip the beater bar; it can scratch the vinyl like sandpaper. Even tiny bits of grit can dull the surface over time, so removing them regularly is key.

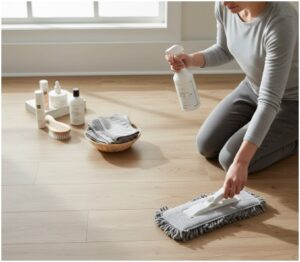
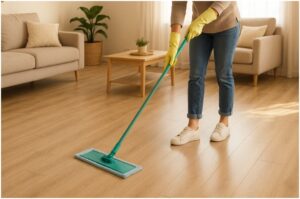
Next, grab a microfiber mop and dampen it slightly with water or a pH-neutral cleaner made for vinyl. I emphasize “damp,” not wet. 

Too much water seeps into the seams and causes warping. I like to think of it as giving the floor a refreshing facial, not a shower.

How Do You Deep Clean Luxury Vinyl Plank Floors Without Damaging Them?

What’s the Best Way to Clean Luxury Vinyl Plank Floors Every Day?

Sometimes, regular cleaning just won’t cut it—especially if you’ve had a busy week or spilled something sticky. That’s when I go for a deeper clean, but I still avoid anything too harsh.

Here’s what I do:

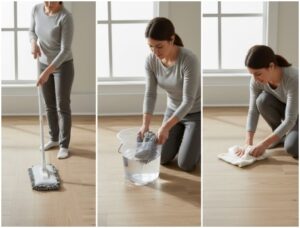
  1. Mix a mild solution — I combine one gallon of warm water with a capful of pH-neutral cleaner. If I’m feeling thrifty, I use one cup of white vinegar per gallon of water instead.
  2. Mop with the grain — I work in small sections using my microfiber mop, moving in the direction of the planks. It prevents streaks and helps lift grime evenly.
  3. Rinse and repeat — After the first pass, I rinse the mop with clean water and go over the floor again to remove any residue.
  4. Dry completely — I finish by wiping the floor with a dry microfiber cloth to prevent water spots.

It’s amazing how just these few steps make the planks look brand new again—without needing a single drop of polish.

How Do You Remove Tough Stains from Luxury Vinyl Plank?

How Do You Remove Tough Stains from Luxury Vinyl Plank?

If you have kids, pets, or a coffee addiction like me, stains are unavoidable. But the good news is that LVP handles them pretty well with the right tricks.

  • Scuff marks: I rub them gently with a pencil eraser or even a tennis ball. It’s oddly satisfying watching them vanish.
  • Grease and crayon: A dab of mineral spirits on a clean cloth works wonders. Just wipe it off with a damp cloth right after.
  • Makeup or ink: A touch of isopropyl alcohol or acetone-free nail polish remover usually does the trick.
  • Food stains (like wine or mustard): I make a baking soda paste, leave it on for 10–15 minutes, then wipe it clean.

Whenever I’m tackling a stain, I remind myself not to panic. Most marks can be lifted gently—you just need patience and the right cleaner.

What Should You Never Use When Cleaning Luxury Vinyl Plank Floors?

If there’s one lesson I’ve learned the hard way, it’s this: not every cleaner belongs near your LVP. Some products promise shine but end up doing long-term damage.

Avoid these at all costs:

  • Abrasive tools like steel wool or stiff brushes—they scratch the surface.

  • Harsh chemicals like bleach or ammonia—they break down the vinyl’s finish.
  • Mop-and-shine products—they leave sticky films that attract more dirt.
  • Wax or polish—LVP doesn’t need them; it already has a protective coating.
  • Steam cleaners—the heat and moisture can loosen adhesive and warp planks.

Your goal is to clean the floor, not strip its protection. Think “spa day” for your vinyl, not boot camp.

Quick Reference Table: My Go-To LVP Cleaning Routine

Task Frequency Tools & Products
Sweep/Vacuum Daily Soft-bristle broom or hard-floor vacuum
Damp Mop Weekly Microfiber mop, pH-neutral cleaner
Deep Clean Monthly Vinegar-water mix or vinyl floor cleaner
Spot Clean As needed Baking soda, alcohol, or mineral spirits

Keeping this simple schedule has saved me countless hours and kept my floors consistently looking photo-ready.

FAQs About How to Clean Luxury Vinyl Plank

Q1: Can I use vinegar to clean luxury vinyl plank floors?

Yes! Mix one cup of white vinegar with a gallon of warm water. It’s mild enough for regular cleaning and cuts through grease without dulling the finish. Just make sure to rinse with clean water afterward.

Q2: How do I make my luxury vinyl plank floors shine again?

Skip the wax—your floors already have a built-in sheen. The best way to restore shine is to clean with a pH-neutral cleaner, rinse well, and dry thoroughly with a microfiber cloth.

Q3: Is it okay to use a steam mop on luxury vinyl plank flooring?

Nope. Steam can weaken the adhesive beneath the planks and cause them to warp or peel over time. Stick to a damp mop and gentle cleaner instead.

Q4: What’s the best cleaner for luxury vinyl plank floors?

Look for cleaners labeled “vinyl-safe” or “pH-neutral.” My personal favorites are simple ones—no harsh fragrances or chemical brighteners.

Polished Floors, Peaceful Mind

I’ll be honest—learning how to clean luxury vinyl plank flooring took some trial and error. But now, it’s become one of those easy, almost meditative chores. I throw on a podcast, grab my mop, and within minutes, the floors are gleaming again.

My final tip? Less is more. Gentle cleaners, soft tools, and consistency are all you need. Treat your LVP kindly, and it’ll reward you with that just-installed glow for years.

More From Author

bathroom sink smells like rotten eggs

Why My Bathroom Sink Smelled Like Rotten Eggs (and What I Did About It)

Renting or Buying a Home Is Connected With Someone’s Ability to Be Generous

Renting or Buying a Home Is Connected With Someone’s Ability to Be Generous

Why My Bathroom Sink Smelled Like Rotten Eggs (and What I Did About It)

I’ll admit it—when my bathroom sink smelled like rotten eggs, I panicked a little. It hit me one morning as I brushed my teeth, and the stench was unmistakable. 

That sulfuric, eggy odor made my whole bathroom feel gross no matter how clean it looked. I scrubbed the sink, sprayed air freshener, even lit a candle. Nothing worked.

That’s when I realized this wasn’t about surface cleaning—it was about what was lurking below. So, I decided to get to the bottom of it, and what I found was equal parts fascinating and disgusting. 

If your bathroom sink ever smells like rotten eggs, here’s how to figure out where it’s coming from and how to fix it for good.

What Causes That Rotten Egg Smell in the First Place?

What Causes That Rotten Egg Smell in the First Place?

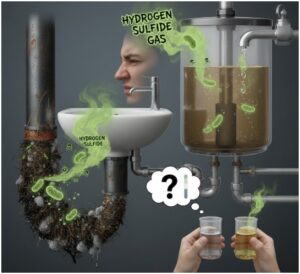
That foul smell usually comes from hydrogen sulfide gas, produced when bacteria feed on grime, hair, and soap scum stuck in your drain. 

Over time, these tiny ecosystems grow in dark, damp pipes, releasing the same gas that gives rotten eggs their signature stink.

But sometimes, the problem isn’t just your drain—it’s your water supply. If bacteria make their way into your plumbing system or water heater, even fresh water can carry that sulfur smell. 

Before pouring random cleaners down the sink, it helps to test where the odor is actually coming from.

How Do You Tell If the Smell Is From the Drain or the Water?

How Do You Tell If the Smell Is From the Drain or the Water?

Here’s the simple test I used, and it works like a charm.

I filled two clean glasses—one with water from the smelly sink and one from a faucet that didn’t smell. Then I took both glasses outside and gave them a good sniff (neighbors probably thought I’d lost it).

  • If only the first glass smells, it’s a drain problem.
  • If both smell, it’s your water supply.

That quick experiment saved me a ton of guessing—and it told me the problem was hiding in my drain.

What Can You Do If the Bathroom Sink Smells Like Rotten Eggs?

Once I knew my drain was the culprit, I started small. You don’t always need to call a plumber right away. Try these fixes in order—they move from easiest to more hands-on.

Can Baking Soda and Vinegar Really Fix the Smell?

Can Baking Soda and Vinegar Really Fix the Smell?

Absolutely. This old-school combo works wonders on drain bacteria and buildup.

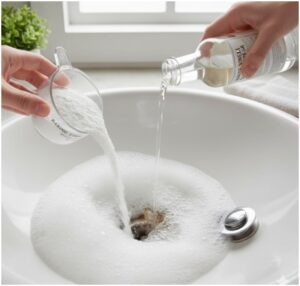
Here’s how I did it: I poured ½ cup of baking soda down the drain, followed by 1 cup of white vinegar. 

The fizzing started right away, so I quickly covered the drain with a plug. After about 20 minutes, I flushed it with hot water.

That bubbling reaction breaks down gunk and neutralizes odors. Plus, it’s eco-friendly and doesn’t harm your pipes. My bathroom instantly smelled fresher after just one round.

Does Pouring Boiling Water Down the Drain Help?

Does Pouring Boiling Water Down the Drain Help?

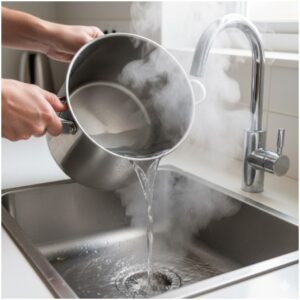
If the smell lingers, boiling water is your next best move. I heated up a big pot of water and carefully poured it straight into the drain. It helps melt greasy buildup and flush away debris.

Just one note—if you have PVC pipes, skip the boiling water and use very hot tap water instead. Boiling water can warp plastic pipes over time.

Sometimes, doing this after the baking soda treatment makes the results even better.

Should You Clean the P-Trap?

Should You Clean the P-Trap?

If the first two methods don’t cut it, the P-trap (the U-shaped pipe under the sink) might be the problem. 

This little bend is meant to hold water to block sewer gases, but it also traps hair, soap scum, and the occasional mystery sludge.

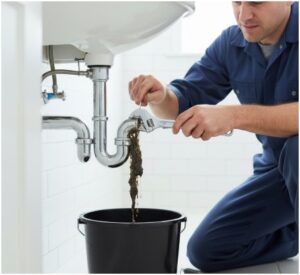
I placed a bucket underneath, unscrewed the pipe joints with a wrench, and removed the P-trap. Let’s just say—it wasn’t pretty. 

After cleaning it out with a wire brush and reattaching it, the smell finally disappeared. Sometimes you just have to face the gunk head-on.

What If the Smell Comes From the Water?

If your bathroom sink smells like rotten eggs even after cleaning the drain, your water supply could be to blame. I learned this the hard way from a friend who had the same issue—it turned out her water heater was the culprit.

Why Does the Smell Only Come From Hot Water?

Why Does the Smell Only Come From Hot Water?

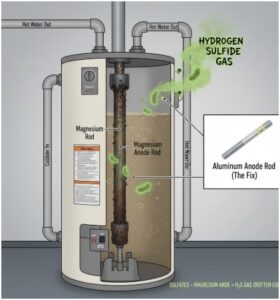
The problem could be the magnesium anode rod inside your water heater. It’s designed to prevent corrosion, but it can react with sulfates in the water, producing hydrogen sulfide gas.

The quick fix? Replace the rod with an aluminum version, or ask a plumber to handle it. Some people temporarily raise their heater temperature to 160°F for a few hours to kill bacteria—but do it carefully to avoid burns or damage.

What If Both Hot and Cold Water Smell Bad?

What If Both Hot and Cold Water Smell Bad?

If you notice the odor in all faucets, especially if you’re on well water, the issue might be sulfate-reducing bacteria in your water source.

This is tougher to fix on your own. You’ll need a water treatment specialist to test your water and possibly install a filtration or disinfection system.

I know that sounds like a lot, but clean, odor-free water is worth every penny—trust me.

When Is It Time to Call a Plumber?

If you’ve tried everything and your bathroom sink still smells like rotten eggs, it’s probably time to call in the pros.

You should definitely reach out if:

  • The odor comes from multiple drains—it could mean a sewer line issue.
  • You hear gurgling sounds from your drains or toilet.
  • The smell returns shortly after cleaning.

A plumber can check your main line, vent pipes, and drainage system for deeper blockages or leaks that DIY methods can’t touch.

FAQs About Why the Bathroom Sink Smells Like Rotten Eggs

Why does my bathroom sink smell worse after running water?

That’s usually because bacteria are getting stirred up when water flows through the drain. The pressure releases hydrogen sulfide gas, which smells stronger while the sink is in use.

Can bleach remove the rotten egg smell?

Bleach can temporarily mask the smell but won’t always solve the root cause. It can also harm your pipes if used frequently. I prefer natural solutions like baking soda and vinegar since they’re gentler and safer.

Is it dangerous to breathe in that sulfur smell?

Short exposure isn’t harmful, but high levels of hydrogen sulfide gas can be irritating. If the smell is strong and constant, ventilate your bathroom and call a plumber—it could signal a sewer gas leak.

How often should I clean my bathroom sink drain?

I like to give my drains a baking soda and vinegar rinse once a month. It keeps things fresh and prevents bacteria from building up again.

Smell Be Gone: A Fresh Ending to a Stinky Situation

I’ll never forget how relieved I felt when that awful smell finally vanished. A clean, odor-free bathroom just feels right—like a small victory for your nose and your sanity.

If your bathroom sink smells like rotten eggs, start simple. Test, clean, and only call in backup if you need to. Sometimes, the worst odors come from the easiest fixes.

Pro tip: Once your sink smells fresh again, keep it that way by running hot water after brushing your teeth and giving it a monthly vinegar flush. Your pipes—and your mornings—will thank you.

More From Author

how to hang towels in bathroom

How to Hang Towels in Bathroom Like a Pro in 2026

how to clean luxury vinyl plank

How to Clean Luxury Vinyl Plank Floors Like a Pro (Without Losing Your Mind)

How to Hang Towels in Bathroom Like a Pro in 2026

I’ll admit it—I used to just toss my towel over the shower rod and call it a day. But after constantly finding my towels damp, wrinkled, and smelling less than fresh, I realized I needed to rethink how to hang towels in bathroom properly. 

It’s not just about where you put them—it’s about how they dry, how they look, and how they fit your space. Once I learned a few clever tricks, my bathroom started looking like a spa instead of a laundry corner.
Why Does the Way You Hang Towels Matter?

Why Does the Way You Hang Towels Matter?

If you’re like me, you’ve probably underestimated this simple habit. Hanging towels the right way keeps them fresher for longer, prevents mildew, and even extends their lifespan. Plus, it makes your bathroom look neat and intentional.

When towels can dry evenly with proper airflow, they stay fluffy instead of stiff. And if you share your bathroom, good hanging habits can prevent that awkward “whose towel is whose” situation.

How to Hang Towels in Bathroom Without Losing Space?

Let’s talk space—the biggest challenge in any bathroom. I used to struggle with towel clutter until I realized I could work smarter, not harder.

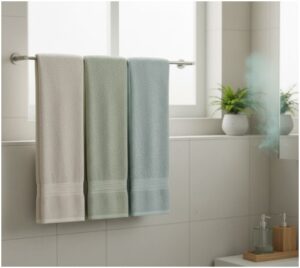
1. Use a Towel Bar for a Classic Look

Use a Towel Bar for a Classic Look- how to hang towels in bathroom

Towel bars are timeless. For me, they instantly made my bathroom feel more polished. The key is folding your towels properly: lay your towel flat, fold it into thirds lengthwise, then in half widthwise. 

When you drape it over the bar, make sure the decorative edge faces outward. This keeps the look clean and hotel-worthy.

2. Try a Space-Saving Double Bar

Try a Space-Saving Double Bar- how to hang towels in bathroom

If your bathroom allows, install a double towel bar. I love this because I can hang my bath towel on the front and my partner’s on the back without them touching. The airflow keeps both towels fresh—no musty smell in sight!

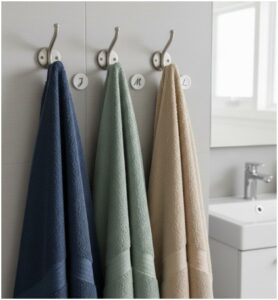
3. Hooks for the Win

Hooks for the Win- how to hang towels in bathroom

Hooks are lifesavers for smaller bathrooms. I hang my towel by pinching it a third down from the top and placing that spot on the hook. It dries surprisingly well and looks effortlessly casual. Bonus: everyone in the household can have their own hook.

What’s the Best Way to Keep Towels Looking Fresh?

I once thought towels lose their fluff just from washing—but it’s often how they’re hung that makes the difference.
If you like that cloud-soft feel, avoid sharp folds that crush fibers. The “wear-reducing fold” is my go-to: fold your towel gently in half lengthwise, then widthwise, without pressing creases. When you drape it over the bar, it keeps that cozy, spa-like texture.
Another trick I swear by: never hang towels too close together. Air needs to move freely between them. When towels overlap, they trap moisture and start to smell. Trust me, giving them space is worth it.

Can You Hang Towels Creatively? Absolutely!

Once I stopped thinking of towels as just “bathroom stuff,” I started seeing them as décor.

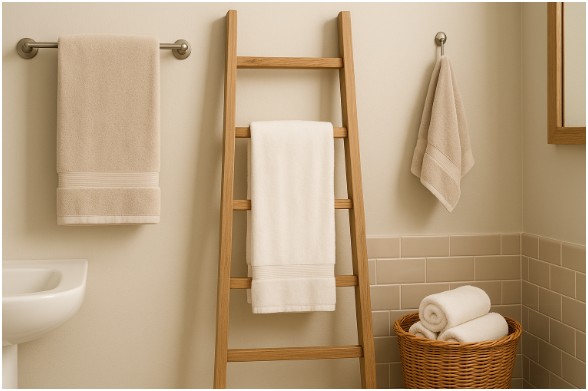
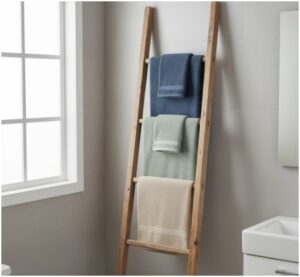
Ladder Racks Add Rustic Charm

Ladder Racks Add Rustic Charm- how to hang towels in bathroom

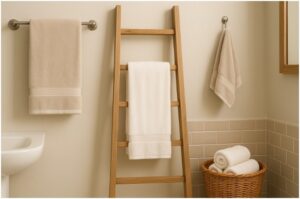
I fell in love with the idea of leaning a wooden ladder against my bathroom wall. It uses vertical space beautifully and makes your towels part of the design. I just drape each folded towel over a rung, leaving space so they don’t overlap. It’s functional art!

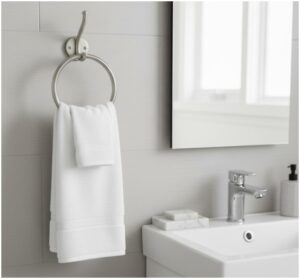
Towel Rings for Hand Towels

Towel Rings for Hand Towels- how to hang towels in bathroom

If you have a small bathroom or a powder room, towel rings are perfect. Fold the towel into thirds vertically, loop it through the ring, and let the decorative side face out. It adds instant elegance with zero effort.

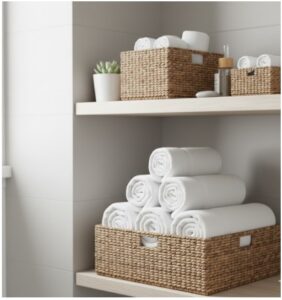
Baskets for That Spa Vibe

Baskets for That Spa Vibe- how to hang towels in bathroom

Rolling towels and placing them in baskets is one of my favorite tricks. It keeps extra towels within reach and looks amazing on open shelving. I roll them tightly and stack them by size—biggest on the bottom, smallest on top—for a tidy look.

How to Hang Towels in Bathroom So They Dry Fast?

Here’s where function meets style. No one likes a damp towel, and airflow is the secret ingredient.

First, make sure your towel isn’t bunched up. Spread it evenly when hanging, whether on a bar or hook. If you have multiple towels, space them at least a few inches apart.

I also keep my exhaust fan on after a shower for at least 15 minutes to clear out humidity. When air circulation improves, towels dry faster, and your bathroom stays fresher overall.

Here’s a quick comparison table for different towel hanging options:

Method Best For Pros Space Needed
Towel Bar Large bathrooms Classic look, good airflow Moderate
Double Bar Shared bathrooms Holds two towels neatly Moderate
Hooks Small bathrooms Easy to install, compact Minimal
Ladder Rack Decorative bathrooms Stylish, vertical space use Medium
Basket Rolls Extra storage Spa aesthetic, portable Minimal

How to Hang Towels in Bathroom: My Simple Routine

Here’s my easy daily method that keeps things neat and fresh:

  1. After showering, shake the towel out to remove moisture.
  2. Hang it unfolded on the bar or hook.
  3. Once dry, refold it for display.
  4. Rotate towels every few days for even wear.

This tiny routine turned my bathroom into a mini retreat—and it takes less than a minute.

FAQs About Hanging Towels in Bathroom

1. Should I fold or hang my towels after use?

Always hang your towels after use to let them dry completely. Folding them while damp traps moisture and encourages mildew. Once they’re dry, feel free to fold them neatly for display.

2. How can I keep my towels from smelling musty?

Good airflow is key. Space them apart, use an exhaust fan, and wash towels regularly. If they still smell, try washing them with a bit of white vinegar—it helps break down buildup that causes odors.

3. Can I hang towels behind the door?

Yes, as long as there’s enough air circulation. Over-the-door hooks are great for tight spaces. Just make sure towels don’t stay pressed flat against the door.

4. What’s the most aesthetic way to hang towels?

For a hotel-like look, use the decorative fold on a towel bar. If you prefer a relaxed style, go for hooks or a rustic ladder. Add some rolled towels in a basket for that final touch of luxury.

Wrapped, Rolled, and Ready: My Final Thoughts

I never realized how much of a difference it made until I changed how to hang towels in bathroom every day with care. Now my towels stay soft, smell fresh, and even make my bathroom feel more organized.

My final tip? Treat your towels like part of your home décor. The way you display them reflects your style and keeps your space inviting. 

Next time you step out of the shower, give your towel the treatment it deserves—it’s the little details that make a home feel polished.

More From Author

how to open locked bathroom door

How to Open Locked Bathroom Door Like a Pro (Without Breaking It!)

bathroom sink smells like rotten eggs

Why My Bathroom Sink Smelled Like Rotten Eggs (and What I Did About It)

How to Open Locked Bathroom Door Like a Pro (Without Breaking It!)

I’ll admit it—locking myself out of the bathroom once made me feel like the world’s most forgetful person. I was home alone, barefoot, and all I had was a paperclip and mild panic. That day, I learned exactly how to open a locked bathroom door without damaging it. 

Since then, I’ve helped friends, neighbors, and even my curious niece who managed to “accidentally” lock herself in.

So, if you’ve found yourself in the same awkward spot, don’t worry. Here’s everything I’ve learned about how to open locked bathroom door safely, quickly, and stress-free.

What’s the Easiest Way to Open a Locked Bathroom Door?

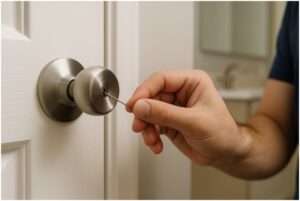
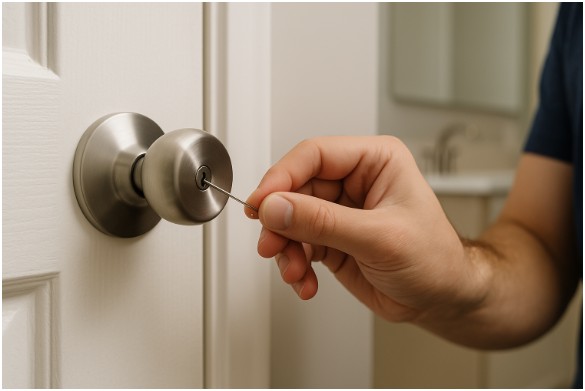
Most bathroom doors use privacy locks, which means they’re built for convenience—not heavy security. These locks often have a small hole in the center of the doorknob, known as an emergency access point.

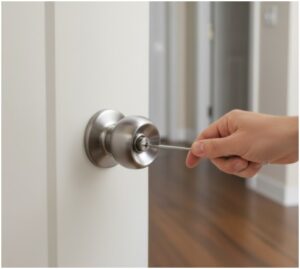
If you see that tiny hole, you’re in luck. You can open it using simple household items like a paperclip, bobby pin, or small screwdriver.

Insert the tool straight into the hole, apply gentle pressure, and either push or twist, depending on your lock type. You’ll feel a click when it releases.

I like this method because it’s quick, damage-free, and doesn’t require fancy tools. It’s basically a DIY escape plan for minor lock mishaps.

How Do You Open a Pinhole or Twist Lock?

When I first figured out the anatomy of a privacy lock, I realized most of them fall into two categories: push-button locks and twist locks. Each needs a slightly different trick to open.

For push-button locks:

How Do You Open a Pinhole or Twist Lock?

Insert your tool (a straightened paperclip works best) into the hole and push gently until you hear or feel a click. That’s the lock disengaging. Then, just turn the knob.

For twist locks:

For twist locks-how to open locked bathroom door

You’ll notice a slotted post inside the hole. In that case, insert your tool and twist it slightly to the left or right. It’s almost like turning a tiny screw. Once you feel resistance release, the door should open easily.

It’s oddly satisfying once you get the hang of it—like solving a little mechanical puzzle with minimal effort.

What If the Door Has a Coin Slot Instead of a Hole?

What If the Door Has a Coin Slot Instead of a Hole?

Some modern bathroom doors skip the pinhole and come with a coin-sized slot instead. When I moved into my apartment, I thought it was decorative until I got locked out one morning.

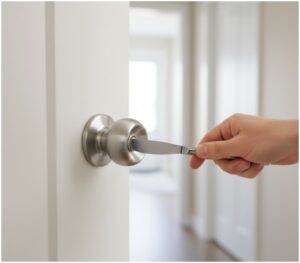
All you need is a coin, butter knife, or flat key. Insert it into the slot and gently turn it either direction. That rotates the internal locking mechanism and unlocks the door. It’s one of the simplest fixes—no jiggling or finesse required.

If you live in newer housing, keep a coin handy. It’s the universal key for this style of privacy lock.

How to Open Locked Bathroom Door Without a Hole

How to Open Locked Bathroom Door Without a Hole

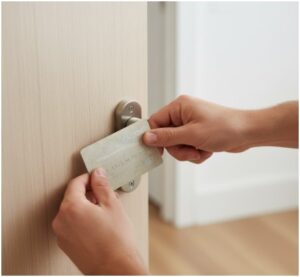
If your doorknob doesn’t have a pinhole or slot, it’s likely a latch-style lock. In that case, I’ve used what I call “the credit card rescue.”

Slide a thin, flexible card—like an old gift card—into the gap between the door and the frame, just above the latch.

Angle the card toward the doorknob and wiggle it while gently pressing on the door. The goal is to push back the latch’s slanted edge until it retracts.

It might take a few tries, but when it works, it feels magical. Just make sure not to use your actual credit card—it can bend or break.

What If the Door Has Visible Screws on the Knob?

What If the Door Has Visible Screws on the Knob?

Here’s another scenario I’ve faced: the lock wouldn’t budge, but the screws were exposed. That’s good news. You can simply disassemble the knob.

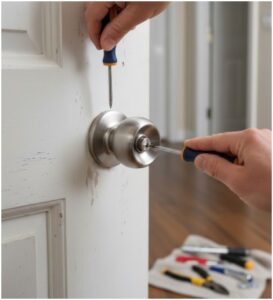
Use a screwdriver to remove the screws on the outer plate of the doorknob. Once the handle comes off, you’ll see the latch mechanism. Turn it manually with your screwdriver to retract it.

It’s a slightly more involved fix, but if you’re comfortable with tools, it’s still an easy win—and far cheaper than calling a locksmith.

What Should You Do If You’re Locked Inside?

I once helped a friend whose toddler locked the door from inside—she was panicking on one side, and I was on the other with a butter knife. If you’re the one trapped inside, stay calm.

First, call out for help if someone’s nearby. It’s always easier to unlock a door from the outside. If not, try the card trick from your side. Sometimes there’s enough play in the latch to slide it back.

If you can reach a window safely—especially on a ground floor—use it as a temporary exit. But if there’s a medical or safety risk (like a child locked in), don’t hesitate. Call the fire department. They handle this sort of thing all the time.

When Should You Call a Professional?

If the lock resists every trick in the book, it might be time to call in a pro. Deadbolts, damaged locks, or high-security bathroom handles require specialized tools.

Calling a locksmith can save you from damaging your door or frame. Plus, they can rekey or replace the lock so it doesn’t happen again. I learned the hard way after scratching up my door during a stubborn lock attempt—some situations just need a professional touch.

Quick Comparison: Common Bathroom Lock Types and Fixes

Lock Type Tool to Use What to Do
Pinhole (Push-button) Paperclip, small screwdriver Push tool straight in until it clicks
Twist Lock (Slotted) Flat tool or key Insert and twist left or right
Coin Slot Coin, butter knife Insert and rotate
Latch Only Plastic card Slide card between frame and latch
Exposed Screws Screwdriver Remove knob and turn latch manually

FAQs About How to Open Locked Bathroom Door

Q1. Can I use a knife to open a locked bathroom door?

Yes, but be careful. Use a butter knife—not a sharp one—to avoid injury or damaging the door. It works well for slot-style locks or in place of a coin for twisting mechanisms.

Q2. Will I damage my lock by using a paperclip or card?

Usually not. Privacy locks are designed for easy unlocking in emergencies. Just don’t force the tool—gentle pressure is enough. If you feel resistance, stop and reassess before trying again.

Q3. What if none of these methods work?

If all else fails, call a locksmith. It’s better to pay for a quick service than to ruin your door. They can open it cleanly and even provide an emergency key for future mishaps.

Q4. Can I prevent this from happening again?

Absolutely. Keep an emergency unlocking tool (like a flat key or paperclip) taped above the doorframe or in a nearby drawer. It’s a small habit that can save big frustration later.

Crisis Averted: My Favorite Trick That Always Works

Every lockout story teaches a little patience and a lot of creativity. For me, the trusty paperclip remains undefeated. It’s simple, reliable, and always nearby—proof that tiny tools can save big headaches.

If you ever find yourself locked out, stay calm and remember: privacy locks are built for safety, not security. You’ll get that door open faster than you think.

Pro Tip: Keep a paperclip in your wallet or a coin on your keychain. You never know when you’ll need a quick bathroom rescue.

More From Author

how to paint bathroom cabinets

How to Paint Bathroom Cabinets (Without Losing Your Mind)

how to hang towels in bathroom

How to Hang Towels in Bathroom Like a Pro in 2026

How to Paint Bathroom Cabinets (Without Losing Your Mind)

I’ll admit it—I used to think repainting bathroom cabinets was one of those HGTV-level projects best left to professionals. That was until I looked at my outdated oak vanity one morning and thought, “Okay, it’s me versus the 90s.”

If you’ve ever stood in your bathroom wishing for a cleaner, more modern look, I promise learning how to paint bathroom cabinets isn’t as hard as it sounds. You just need patience, the right materials, and a weekend’s worth of determination (plus coffee… lots of coffee).

So, grab your paintbrush—here’s exactly how I transformed my bathroom cabinets from tired to timeless.

What Should You Do First Before Painting Bathroom Cabinets?

What Should You Do First Before Painting Bathroom Cabinets?

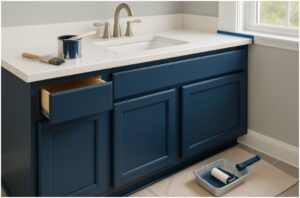
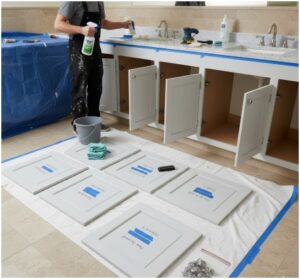
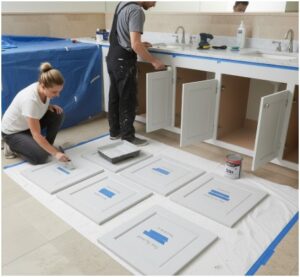
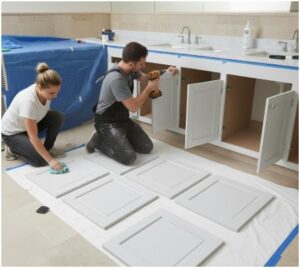
Before even opening a paint can, I learned preparation makes or breaks your finish. Start by clearing your workspace. Take everything out of the cabinets and remove the doors, drawers, and hardware. I labeled mine with painter’s tape so reassembly didn’t turn into a jigsaw puzzle.

Next, I cleaned every inch of the surface using a degreaser (TSP works like magic) to remove the grime, soap residue, and oils that build up over time.

Don’t skip this—paint won’t stick to dirt. Once everything was squeaky clean, I filled small dents and old hardware holes with wood filler and sanded them smooth once dry.

Finally, I taped off surrounding areas like the wall and countertop, then laid a drop cloth on the floor. The goal here is to make sure paint lands on your cabinets—not your tiles.

How Do You Sand Bathroom Cabinets for a Smooth Finish?

How Do You Sand Bathroom Cabinets for a Smooth Finish?

I used to think sanding was optional. Spoiler alert—it’s not. Sanding gives your paint something to cling to, especially on glossy or finished wood.

For wooden cabinets, I started with medium-grit (150) sandpaper to rough up the old finish, followed by a fine-grit (220) pass for smoothness.

If you’re working with laminate, go gently with fine-grit paper—just enough to dull the shine. Thermofoil cabinets need even more care: if the vinyl coating is peeling, you’ll want to remove it completely using a heat gun before sanding the MDF underneath.

Once I finished sanding, I wiped down every surface with a damp microfiber cloth to remove dust. A clean, smooth surface is the secret to a professional-looking result when figuring out how to paint bathroom cabinets properly.

What Kind of Primer Should You Use on Bathroom Cabinets?

What Kind of Primer Should You Use on Bathroom Cabinets?

When it comes to primer, don’t go cheap. Bathrooms are humid, and moisture is the enemy of fresh paint. I learned that the hard way when my first attempt peeled within months.

This time, I used a high-quality bonding primer designed for kitchens and baths. My personal favorites include Zinsser B-I-N Shellac Primer and INSL-X Stix—both grip like a dream and block stains.

Apply your primer in thin, even coats. I used a foam roller for flat surfaces and a brush for corners and grooves. Let it dry completely before painting, and if you’re covering dark wood with a light color, add a second coat. Primer sets the foundation for the paint to do its job beautifully.

How to Paint Bathroom Cabinets for a Flawless Finish

How to Paint Bathroom Cabinets for a Flawless Finish

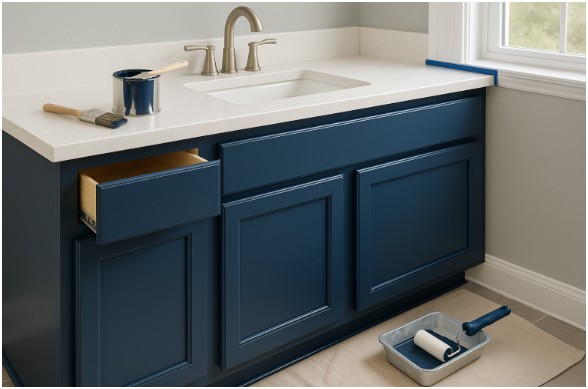
Now, the fun part—painting! I chose a semi-gloss cabinet paint that can handle moisture, scrubbing, and the chaos of daily bathroom life.

If you’re choosing between brands, I swear by Sherwin-Williams Emerald Urethane Trim Enamel or Benjamin Moore ADVANCE for that smooth, factory-like finish.

Here’s the trick: apply two to three thin coats instead of one thick one. I brushed along the grain, let each coat dry completely, and gave a light sanding between coats to knock down any tiny bumps. If you’re painting laminate cabinets, consider sealing with a clear topcoat for extra durability.

Below is a quick comparison of popular cabinet paints I’ve personally tested:

Paint Brand Finish Best Feature
Benjamin Moore ADVANCE Satin/Semi-Gloss Self-leveling, smooth coverage
Sherwin-Williams Emerald Urethane Semi-Gloss Excellent moisture resistance
Behr Urethane Alkyd Enamel Satin Budget-friendly & durable

Once you’re done, resist the urge to reattach the doors immediately. Paint dries in hours—but curing takes days. I waited a full week before putting my cabinets back together, and it paid off in a rock-solid finish.

What’s the Final Step After Painting Bathroom Cabinets?

What’s the Final Step After Painting Bathroom Cabinets?

When the last coat was dry to the touch, I carefully peeled off the painter’s tape while the paint was still slightly soft to prevent edge lifting. Then came the waiting game. Letting paint cure fully (five to seven days) ensures it hardens properly.

Finally, I reattached the hardware and doors, matching my labels. The first time I stepped into my bathroom after reassembly, it looked like a completely new space—fresh, clean, and modern without replacing a single cabinet.

If you’re serious about learning how to paint bathroom cabinets that last, patience is your best tool. Every step—cleaning, sanding, priming, painting, and curing—matters more than the paint color itself.

FAQs About How to Paint Bathroom Cabinets

1. Can I paint bathroom cabinets without sanding?

Technically, yes—but you’ll regret it. Sanding helps paint stick and prevents chipping later. If you really want to skip sanding, use a deglosser and a bonding primer, but I’d still give it a light scuff for best results.

2. What type of paint finish is best for bathroom cabinets?

I recommend satin or semi-gloss. These finishes resist moisture, clean easily, and give a slight sheen that looks polished but not too shiny. Matte finishes may look trendy but don’t hold up well in humid rooms.

3. How long does it take to paint bathroom cabinets?

Between prep, sanding, priming, painting, and curing—it took me about a week. Most of that time is drying and curing. The actual painting can be done in two to three days if you work efficiently.

4. Do I need a topcoat?

If your cabinets face heavy use or you’re painting laminate, yes. A clear polyurethane or acrylic topcoat adds extra protection and helps your paint last longer.

The Glow-Up You Deserve

Here’s the thing—I never realized how much a coat of paint could change a space until I tackled my own bathroom. Learning how to paint bathroom cabinets wasn’t just a DIY project; it was instant therapy. The process forced me to slow down, pay attention, and actually enjoy creating something with my own hands.

If you’re standing in front of dated cabinets wondering if it’s worth it—trust me, it is. You’ll save money, add value to your home, and feel that satisfying spark every time you walk into a bathroom that looks brand-new. Just remember: prep well, use quality products, and let patience work its magic.

More From Author

moisture bugs in bathroom

Moisture Bugs in Bathroom: What’s Really Lurking in the Steam?

how to open locked bathroom door

How to Open Locked Bathroom Door Like a Pro (Without Breaking It!)

Moisture Bugs in Bathroom: What’s Really Lurking in the Steam?

A few months ago, I walked into my bathroom late at night and saw something silvery dart across the floor like a tiny Olympic sprinter. My heart stopped. 

I flipped on the light, grabbed a tissue, and—well, missed completely. That was my introduction to moisture bugs in the bathroom, and honestly, I wish it had been less dramatic.

If you’ve ever spotted little insects near your drains or behind your toilet, you’re not alone. Bathrooms are basically spas for bugs—warm, wet, and full of hiding spots. 

The good news? You can absolutely reclaim your space with some simple, consistent fixes that don’t require calling an exterminator right away.

Why Do Moisture Bugs Love Bathrooms So Much?

Why Do Moisture Bugs Love Bathrooms So Much?

Moisture is like a neon “vacancy” sign for bugs. Every time you shower, run the sink, or even hang damp towels, humidity levels rise. 

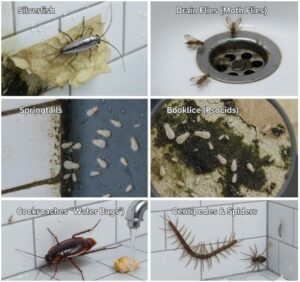
Add a bit of leftover soap scum, hair, and warmth, and you’ve created a five-star resort for critters like silverfish, drain flies, springtails, and booklice.

I learned the hard way that even a small leak or poor ventilation can turn into a breeding ground. When I fixed a slow-draining sink and started leaving the fan on after showers, the bug population mysteriously disappeared. Turns out, controlling moisture really is the ultimate pest control hack.

What Moisture Bugs Are Common in Bathrooms?

What Moisture Bugs Are Common in Bathrooms?

Not all creepy-crawlies are the same—and knowing who’s who helps you get rid of them faster. Here’s what might be hiding in your tiles or drains:

Bug Type How to Spot Them Why They’re There
Silverfish Silvery-gray, fast, and wiggly Love paper, mildew, and damp corners
Drain Flies (Moth Flies) Fuzzy, slow flyers near drains Breed in slimy drain residue
Springtails Tiny and jumpy Thrive in constant dampness
Booklice (Psocids) Super small, mold-feeding Indicate high humidity levels
Cockroaches (“Water Bugs”) Larger, dark brown Attracted to moisture and food bits
Centipedes & Spiders Long legs, fast They hunt the other bugs!

When I first noticed drain flies fluttering around, I thought they were harmless. A few days later, I realized their numbers were growing. Lesson learned: when you spot one, there are probably more lurking where you can’t see them.

How Do You Get Rid of Moisture Bugs in the Bathroom?

It’s all about consistency and cutting off their comfort zones. After trying a dozen Pinterest hacks (some better than others), these are the fixes that actually worked for me.

1. Control Moisture and Humidity

Control Moisture and Humidity- moisture bugs in bathroom

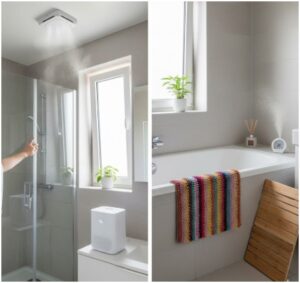
Run your bathroom’s exhaust fan while showering and for at least 15 minutes afterward. If you don’t have a fan, crack a window to let moisture escape. I even added a small dehumidifier that keeps humidity between 30–50%—perfect for keeping bugs away.

Also, make sure your bath mats dry completely. I started hanging mine over the tub instead of leaving it on the floor, and it made a huge difference.

2. Fix Leaks—Even Tiny Ones

Fix Leaks—Even Tiny Ones- moisture bugs in bathroom

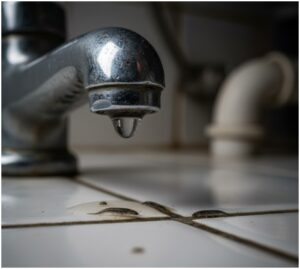
A dripping faucet or slow leak under the sink might seem minor, but to bugs, it’s a lifelong water supply. Tighten those connections, replace damaged seals, and wipe down condensation. My plumber once said, “If you can hear a drip, bugs can too.” He was right.

3. Clean Drains and Eliminate Breeding Spots

Clean Drains and Eliminate Breeding Spots- moisture bugs in bathroom

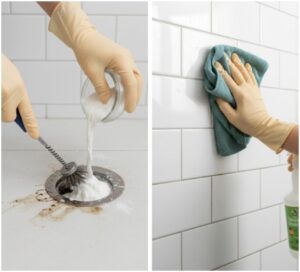
For drain flies, I scrub the inside of my drains with a long brush, then flush with boiling water to destroy biofilm buildup. Avoid pouring harsh chemicals—natural methods like vinegar and baking soda also do wonders.

Wiping down tiles and shower walls after bathing prevents mold, which is what many bugs feed on. It’s one of those habits that sounds tedious until you realize how effective it is.

4. Seal Up the Sneaky Entry Points

Seal Up the Sneaky Entry Points- moisture bugs in the bathroom

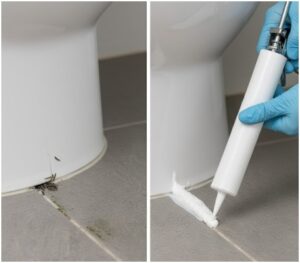
I once found tiny cracks around the base of my toilet and wondered why the silverfish population wouldn’t quit. Sealing them with silicone caulk solved it. Check around pipes, tiles, and windows—bugs love squeezing through even hairline gaps.

5. Use Traps and Natural Repellents

use Traps and Natural Repellents- moisture bugs in the bathroom

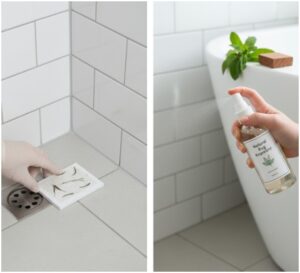
Sticky traps near drains can catch silverfish and other small pests. For a natural approach, peppermint oil and cedarwood are my go-to essential oils. I dilute them with water and spritz around baseboards and corners. It keeps the space smelling fresh too—bonus points.

6. Know When to Call in the Pros

Know When to Call in the Pros- moisture bugs in the bathroom

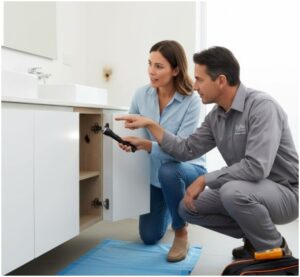
If the infestation doesn’t fade within a week or two, don’t tough it out. Pest control experts can spot hidden water sources or nests you might miss. I had to call one once, and he found a small leak behind the vanity that I’d completely overlooked.

What Preventive Habits Actually Keep Bugs Away?

The key is to make your bathroom as inhospitable as possible without turning it into a sterile lab. I follow this mini routine:

  • Run the fan every time I shower.
  • Wipe down surfaces once daily.
  • Empty the trash often.
  • Deep clean drains twice a month.
  • Keep toiletries in sealed containers.

These tiny habits might sound extra, but they save me hours of bug-battling later.

FAQs About Moisture Bugs in Bathroom

1. Why do I keep getting moisture bugs in my bathroom?

Because bathrooms are naturally humid! If ventilation is poor or leaks persist, moisture builds up and attracts pests like silverfish and drain flies. Focus on lowering humidity and cleaning drains regularly—it’s the simplest long-term fix.

2. Are moisture bugs harmful?

Most are harmless, but they can be unpleasant to look at. Cockroaches and some flies, however, can carry bacteria. Even if they don’t bite or sting, they indicate a moisture issue that needs attention.

3. What kills moisture bugs instantly?

For quick results, use boiling water in drains or spray diluted peppermint oil. For silverfish, diatomaceous earth works well. Still, the real trick is eliminating what attracts them in the first place: water and grime.

4. How long does it take to get rid of them?

If you act fast, you can notice fewer bugs within a few days. Deep cleaning and moisture control usually show results in about a week. Persistent infestations may need professional help.

Bye-Bye Bugs, Hello Fresh Bathroom

I used to think a few tiny bugs were just “part of apartment life.” Now, I know that controlling moisture is the magic trick to keeping them away for good. The moment I started using my fan consistently, sealed those sneaky cracks, and kept drains squeaky clean, my bathroom went from buggy to blissful.

Here’s my parting tip: treat your bathroom like a living space, not just a utility room. Keep it dry, bright, and clean—it’ll reward you with peace, comfort, and the pure satisfaction of knowing there are no creepy surprises waiting under the sink.

Meta Title (60 characters):
Moisture Bugs in Bathroom: Easy Fixes for a Fresher Space

Meta Description (156 characters):

More From Author

christmas door decoration ideas for school

Christmas Door Decoration Ideas for School That Bring the Holiday Magic

how to paint bathroom cabinets

How to Paint Bathroom Cabinets (Without Losing Your Mind)