


I’ll admit it — the first time I tried to paint my popcorn ceiling, I made a complete disaster of it. There was paint dripping on my hair, little flecks of ceiling texture on the floor, and a streaky patch right above the light fixture.
But once I figured out the right technique, painting a popcorn ceiling turned from a nightmare into one of the easiest DIY wins in my home.
If you’ve been putting off the job because you’re worried about ruining the texture or dealing with a mess, don’t stress.
I’ve learned exactly how to paint popcorn ceiling the smart way — safely, efficiently, and with minimal cleanup. Here’s everything you need to know from prep to that satisfying final look.
What Should You Check Before Painting a Popcorn Ceiling?
Before you even touch a paintbrush, there’s one critical step that could save you a ton of trouble: testing for asbestos.
If your home was built before 1980, there’s a chance your ceiling texture contains asbestos — a dangerous material you should never disturb. The safest way to check is to carefully take a small, undisturbed sample and send it to a certified lab.
If the test comes back positive, you’re in luck — you can still paint it safely. Painting seals the surface and keeps the asbestos intact as long as you don’t scrape or sand it. So grab your roller, not a scraper.
How Do You Prepare a Room Before Painting a Popcorn Ceiling?

Painting a popcorn ceiling can get messy — paint drips, texture flakes, and dust are all part of the deal. That’s why prep is your best friend.
Start by removing furniture and wall décor. If something’s too heavy to move, cover it with plastic sheeting and tape it down securely. I like to use painter’s tape to hold everything in place — it’s easy to peel off later.
Lay drop cloths across the floor and seal them around the edges. Then cover your walls or trim with plastic or brown paper, especially if you’re using a sprayer. Trust me, you’ll thank yourself later when there’s not a single paint splatter on your couch.
Before painting, gently clean the ceiling using a vacuum with a soft brush attachment. The goal is to remove dust without disturbing the texture. If you notice any water stains, seal them with an oil-based, stain-blocking primer. That prevents old marks from bleeding through your fresh coat.
Want to know if your ceiling was painted before? Flick a few drops of water onto it. If the water soaks in, it’s unpainted — you’ll need a primer. If it beads up, your ceiling already has a sealed surface.
What Type of Paint and Tools Work Best for Popcorn Ceilings?
The secret to success lies in your choice of tools. Popcorn ceilings are tricky because of their uneven surface, so using the right materials makes all the difference.
Paint: Go for high-quality acrylic-latex interior paint. A flat or matte finish hides imperfections beautifully and gives you that classic ceiling look.
Primer: For unpainted or water-stained ceilings, use an oil-based stain-blocking primer. This helps prevent texture softening or flaking.
Tools:
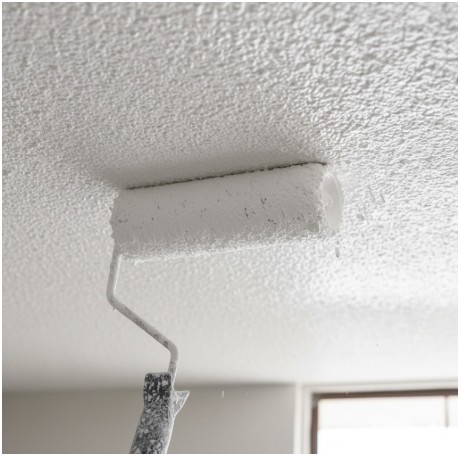
- For rolling, pick a thick-nap roller (½ to ¾ inch). It grabs enough paint to cover the texture evenly.
- If you want a faster, cleaner finish, an airless paint sprayer does the job perfectly.
You can even use a foam roller with slits to reach into all those nooks and crannies — a trick I picked up after my second DIY attempt.
Here’s a quick comparison to help you choose your method:
| Method | Best For | Pros | Cons |
| Roller | Small to medium rooms | Easy to control, affordable | Slower, may cause texture fall-off if pressed too hard |
| Paint Sprayer | Large rooms or high ceilings | Even coverage, fast application | Requires masking and practice to avoid overspray |
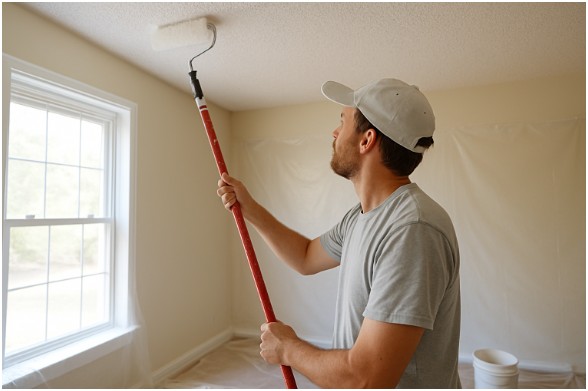
How to Paint Popcorn Ceiling Like a Pro (Step-by-Step)
Once your room is prepped and your tools are ready, it’s time to get to work.
Step 1: Cut in the edges.
Use an angled brush to paint along the edges where the ceiling meets the wall and around light fixtures. Move slowly and gently — heavy strokes can pull down the popcorn texture.
Step 2: Roll the first coat.
Using your thick-nap roller, apply paint in one direction with light pressure. Work in small sections using the “W” method — create overlapping W-shaped strokes and fill in the gaps. This ensures even coverage without crushing the texture.
Step 3: Let it dry.
Give the first coat at least 2 hours to dry completely. Don’t rush it — popcorn texture absorbs paint differently than flat surfaces.
Step 4: Apply the second coat.
For the second coat, roll in the opposite direction of the first. This helps catch any missed spots and smooths out the finish.
Step 5: Inspect and clean up.
Once it’s dry, check for any patchy areas or drips. Touch up gently with a small brush, then remove all plastic coverings and drop cloths. Clean your tools right away so they’re ready for the next project.
Is a Paint Sprayer Better Than a Roller for Popcorn Ceilings?
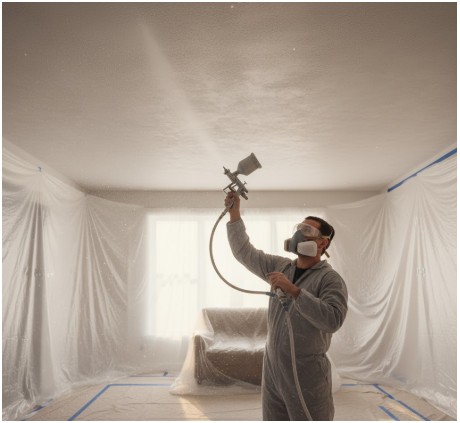
Honestly, both methods can give great results — it just depends on your space and comfort level.
A sprayer is faster and gives you a smoother, more consistent finish. It’s ideal for big rooms or high ceilings where using a roller can be tiring. But if you’re a beginner, the cleanup and masking can be intimidating.
Rollers, on the other hand, are budget-friendly and easier to control. Just remember — light pressure is key. Too much force will pull down chunks of texture, and you’ll spend more time fixing it than painting.
Personally, I prefer a sprayer for large projects and a roller for smaller touch-ups. It’s all about what feels manageable to you.
FAQs About How to Paint Popcorn Ceiling
1. Do I need to prime a popcorn ceiling before painting?
If your ceiling has never been painted before, yes — primer is essential. It seals the surface, prevents absorption, and helps your paint stick evenly. Go with an oil-based, stain-blocking primer for best results.
2. What’s the best paint finish for popcorn ceilings?
Flat or matte finishes are your best bet. They hide flaws and create a clean, uniform appearance. Avoid glossy finishes since they reflect light and highlight imperfections.
3. Can I paint over a dirty popcorn ceiling?
You can, but it’s not a great idea. Dust, cobwebs, and debris can cause uneven paint and peeling later. Always clean gently with a soft vacuum attachment before painting.
4. How long does it take to paint a popcorn ceiling?
It depends on your room size and whether you use a roller or sprayer. Typically, a standard 10×12 room takes about 4–6 hours, including prep and drying time between coats.
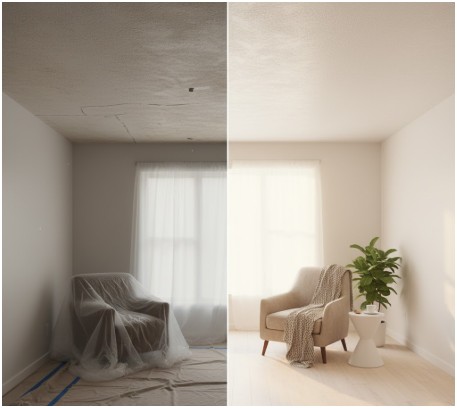
The Ceiling’s the Limit — Literally
Painting a popcorn ceiling might sound intimidating, but once you’ve done it right, it feels incredibly rewarding. I still remember standing under my freshly painted ceiling, grinning at how bright and modern it looked.
If you’re careful during prep, gentle with your roller, and patient between coats, you’ll end up with a clean, refreshed ceiling that completely transforms the room.
So throw on that old T-shirt, grab your roller (or sprayer), and get ready to look up and smile — your ceiling’s about to shine.